
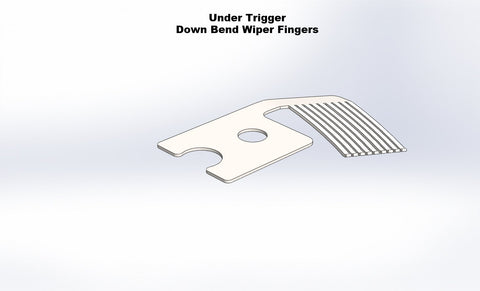

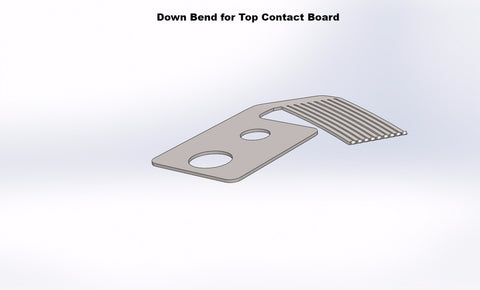
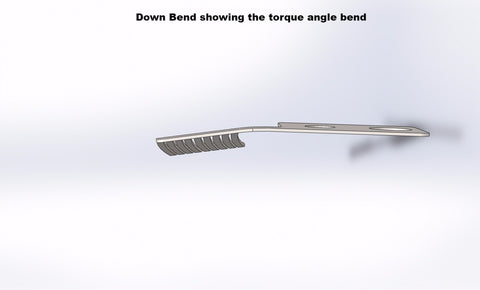

Latest Stainless Steel Wiper Fingers.
- Down Bend. (From 2017 with Contact Board v10) (All models since 2020)
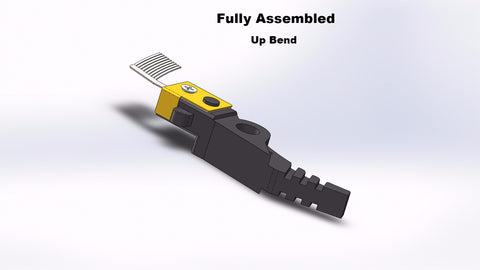
- Up Bend. (Early versions before 2017)
These can be fitted in place the earlier brass or beryllium copper versions on the versions before 2017.
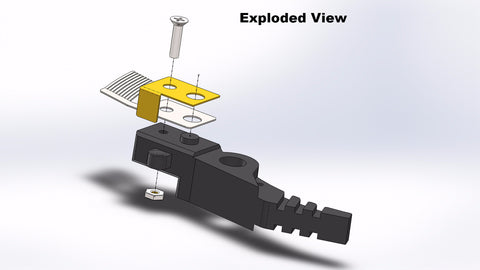
See the images for disassembly and reassembly.
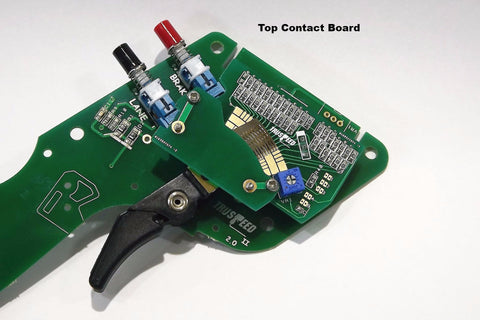
The new Contact Boards have a nickel plating and a final gold plate to further prevent oxidisation and help maintain long term connection integrity.
The Contact Boards from 2017 use the Version 10 Top contact type.
Models from 2020 all use the same down bend wiper fingers.
See Contact Board 10 Images for more images.
The Stainless steel wiper fingers exert more pressure on the surface, but because it is so smooth the trigger still glides over the contacts with a very easy feel.
Tests at 24 hour events and several shorter racing sessions have shown great results with almost no trace of the track of the wiper over the element.
New controllers are fitted with this new wiper as standard.
Previous versions can be upgraded.
- See the exploded view images for an overview.
- Split the handle casing by removing the 6 M2x2mm screws.
- Remove the two M2 nuts and washers securing the Element board in place.
- Lift the Element board off the studs noting the 3-way connector as it unplugs.
- Check the condition of the wiper board. If you have an earlier version it will be plain copper coloured. If this is the case then it can be cleaned with an ink eraser or a fibre glass pen to shine and deoxidise the segments. If it is the new nickle/gold element then simply wipe it clean with lighter fluid or methylated spirits.
- Set the cleaned element to one side and now look to the trigger assembly.
- Remove the countersink M2x5mm screw and M3 brass securing washer.
- Remove the spring from the adjustable tension cam.
- Lift the trigger assembly over the pivot to gain access to the wiper fingers.
- Cut the wiper fingers and connecting arm off the brass or beryllium copper version to form the saddle shape seen in the overview.
- Remove the M2 screw and nut and fit the new stainless steel wiper fingers under the saddle shape you just created.
- Gently countersink the M2 screw hole in the brass saddle with an M4 drill. (This allows more clearance for the screw from the Contact Board)
- Fit the nut and screw and secure it all back in place.